Most real estate agents still document property inventories with a Word template, a spreadsheet, or a piece of paper. The agent fills it in by hand during the walkthrough, takes a few photos on their phone, and then tries to merge everything into a presentable document later — a process that can easily take an hour per property.
There's a much faster way. This guide covers what a property inventory should include, how to structure it room by room, and how to generate a professional PDF — with photos and signature fields — in about two minutes from your phone.
What is a property inventory?
A property inventory is a document that lists all the furniture, appliances, and fixtures included with a property at the time of transfer. It's used in both property sales and rental agreements, and it should be signed by both parties — buyer and seller, or landlord and tenant — to have any practical value.
The inventory serves as the official record of what was present and in what condition. If a dispute arises later about a missing appliance or damaged furniture, the signed inventory is the reference document. Without it, both parties are relying on memory and goodwill — which is rarely a stable foundation for a disagreement involving significant money.
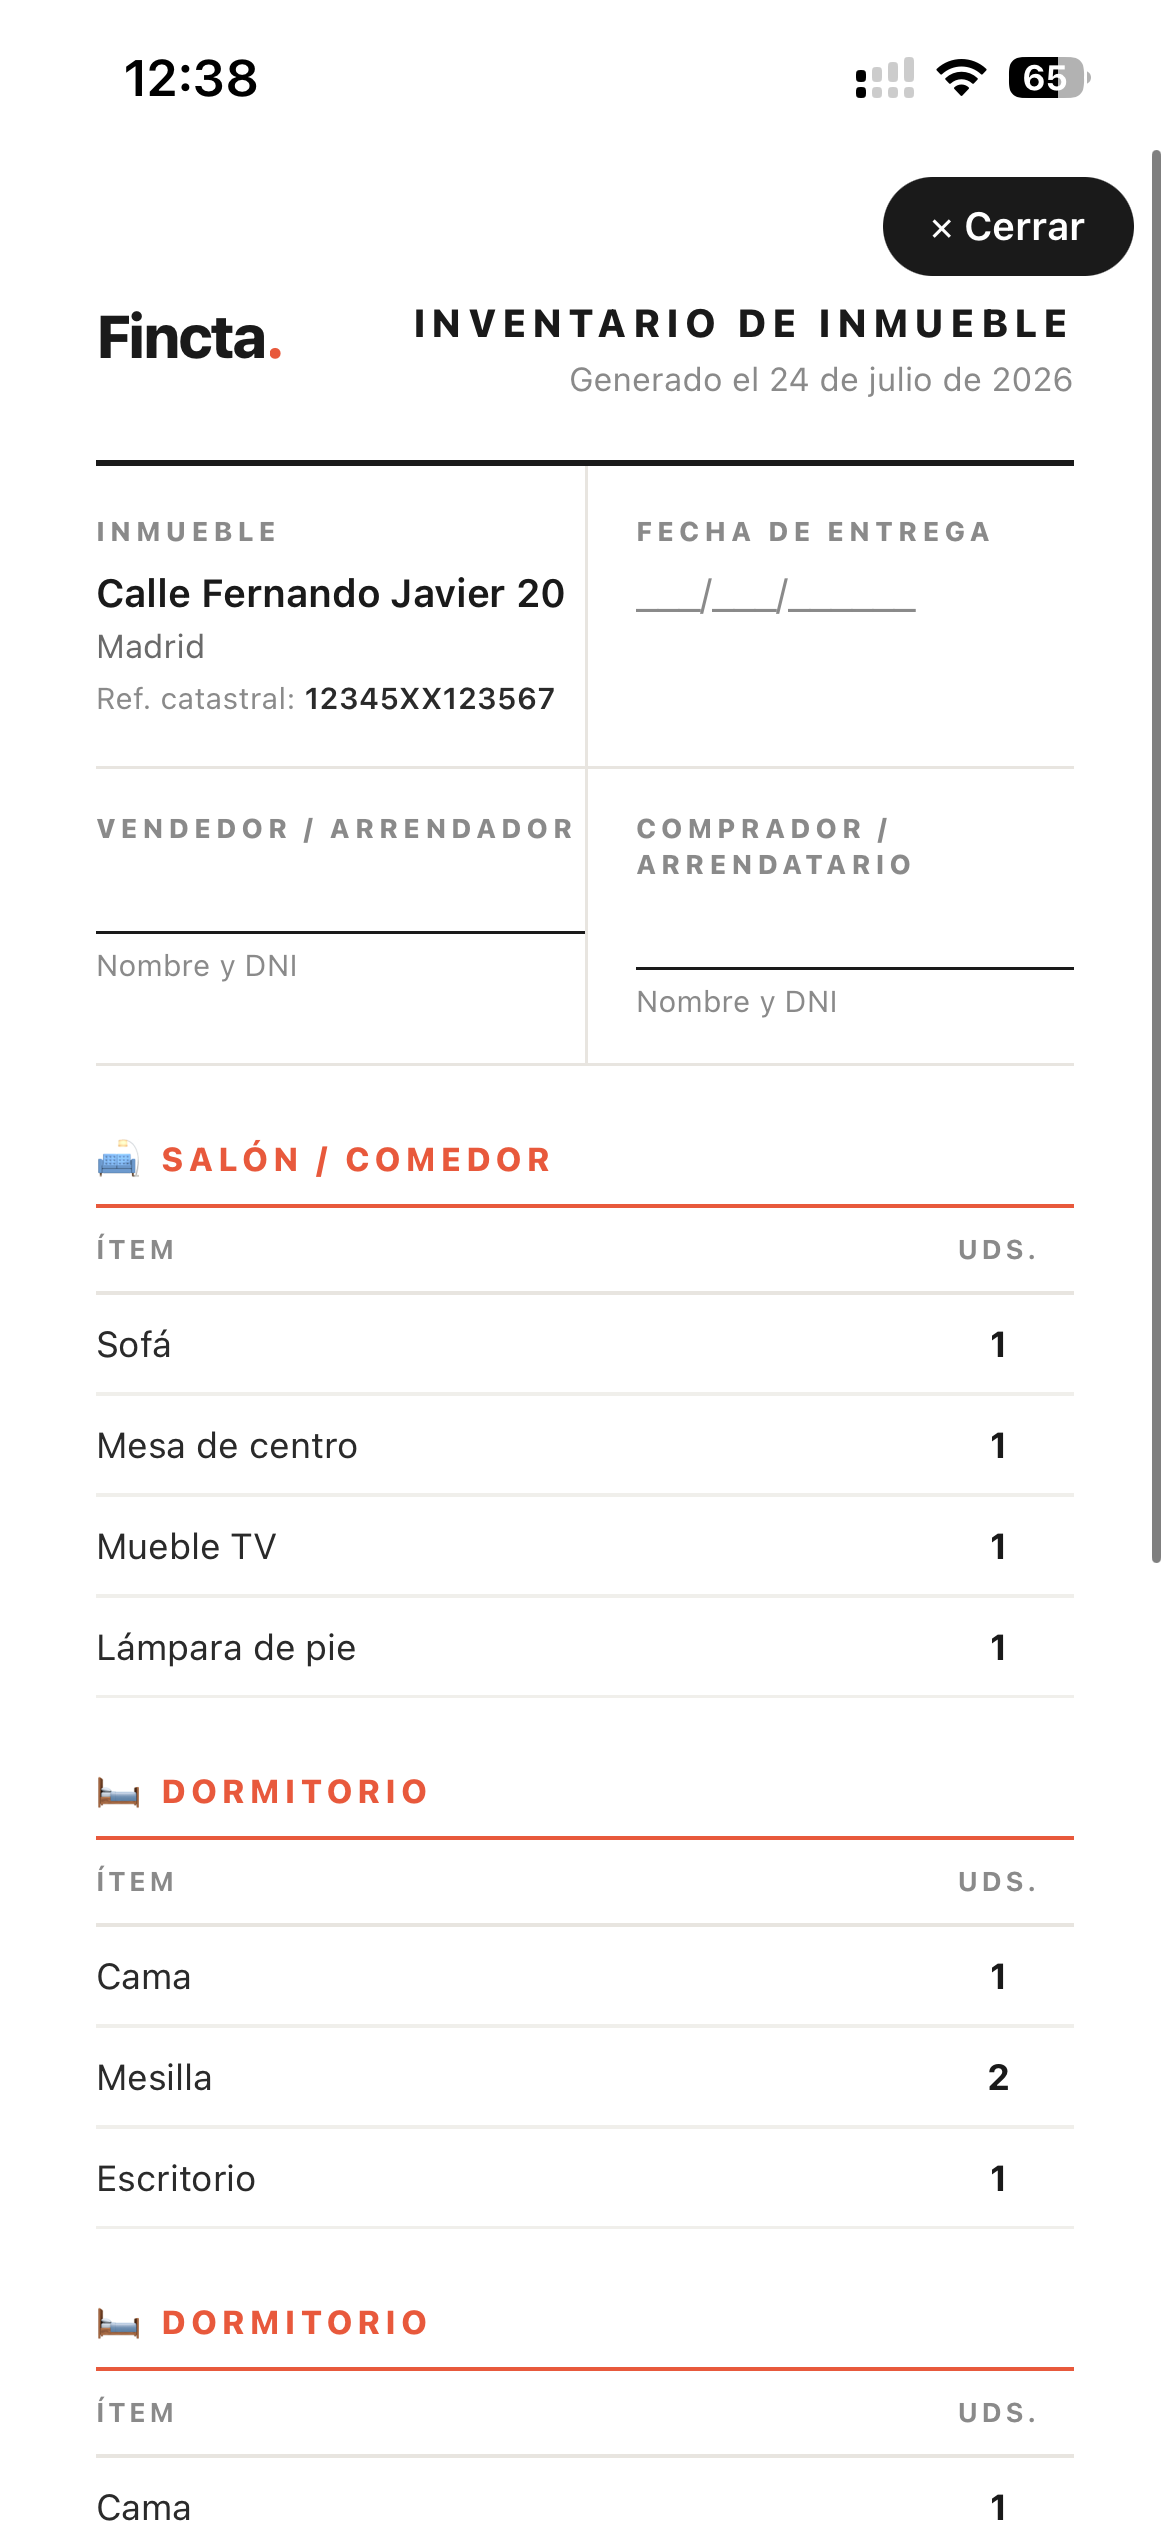
What to include in your property inventory template
A complete property inventory should be organised by room. For each room, list every item of furniture and every fixed appliance, noting the quantity and general condition. Here's a room-by-room breakdown:
- Living room: Sofas, armchairs, coffee table, TV unit, lighting fixtures, curtains or blinds, rugs
- Kitchen: Refrigerator, dishwasher, oven, microwave, extractor hood, washing machine (if fitted), kitchen table and chairs
- Bedrooms: Beds, mattresses, bedside tables, wardrobes, desks, chest of drawers — listed per bedroom
- Bathrooms: Fixed fittings (bath, shower, toilet, sink), towel rails, mirror, any included accessories
- Terrace or garden: Outdoor furniture, barbecue, planters, irrigation systems
- Storage / garage: Any items stored that are included in the sale or rental
Beyond the item list, a solid inventory template also includes a photos section (at least one photo per room), condition notes for items that are not in perfect condition, and a signatures section at the end for both parties to sign and date.
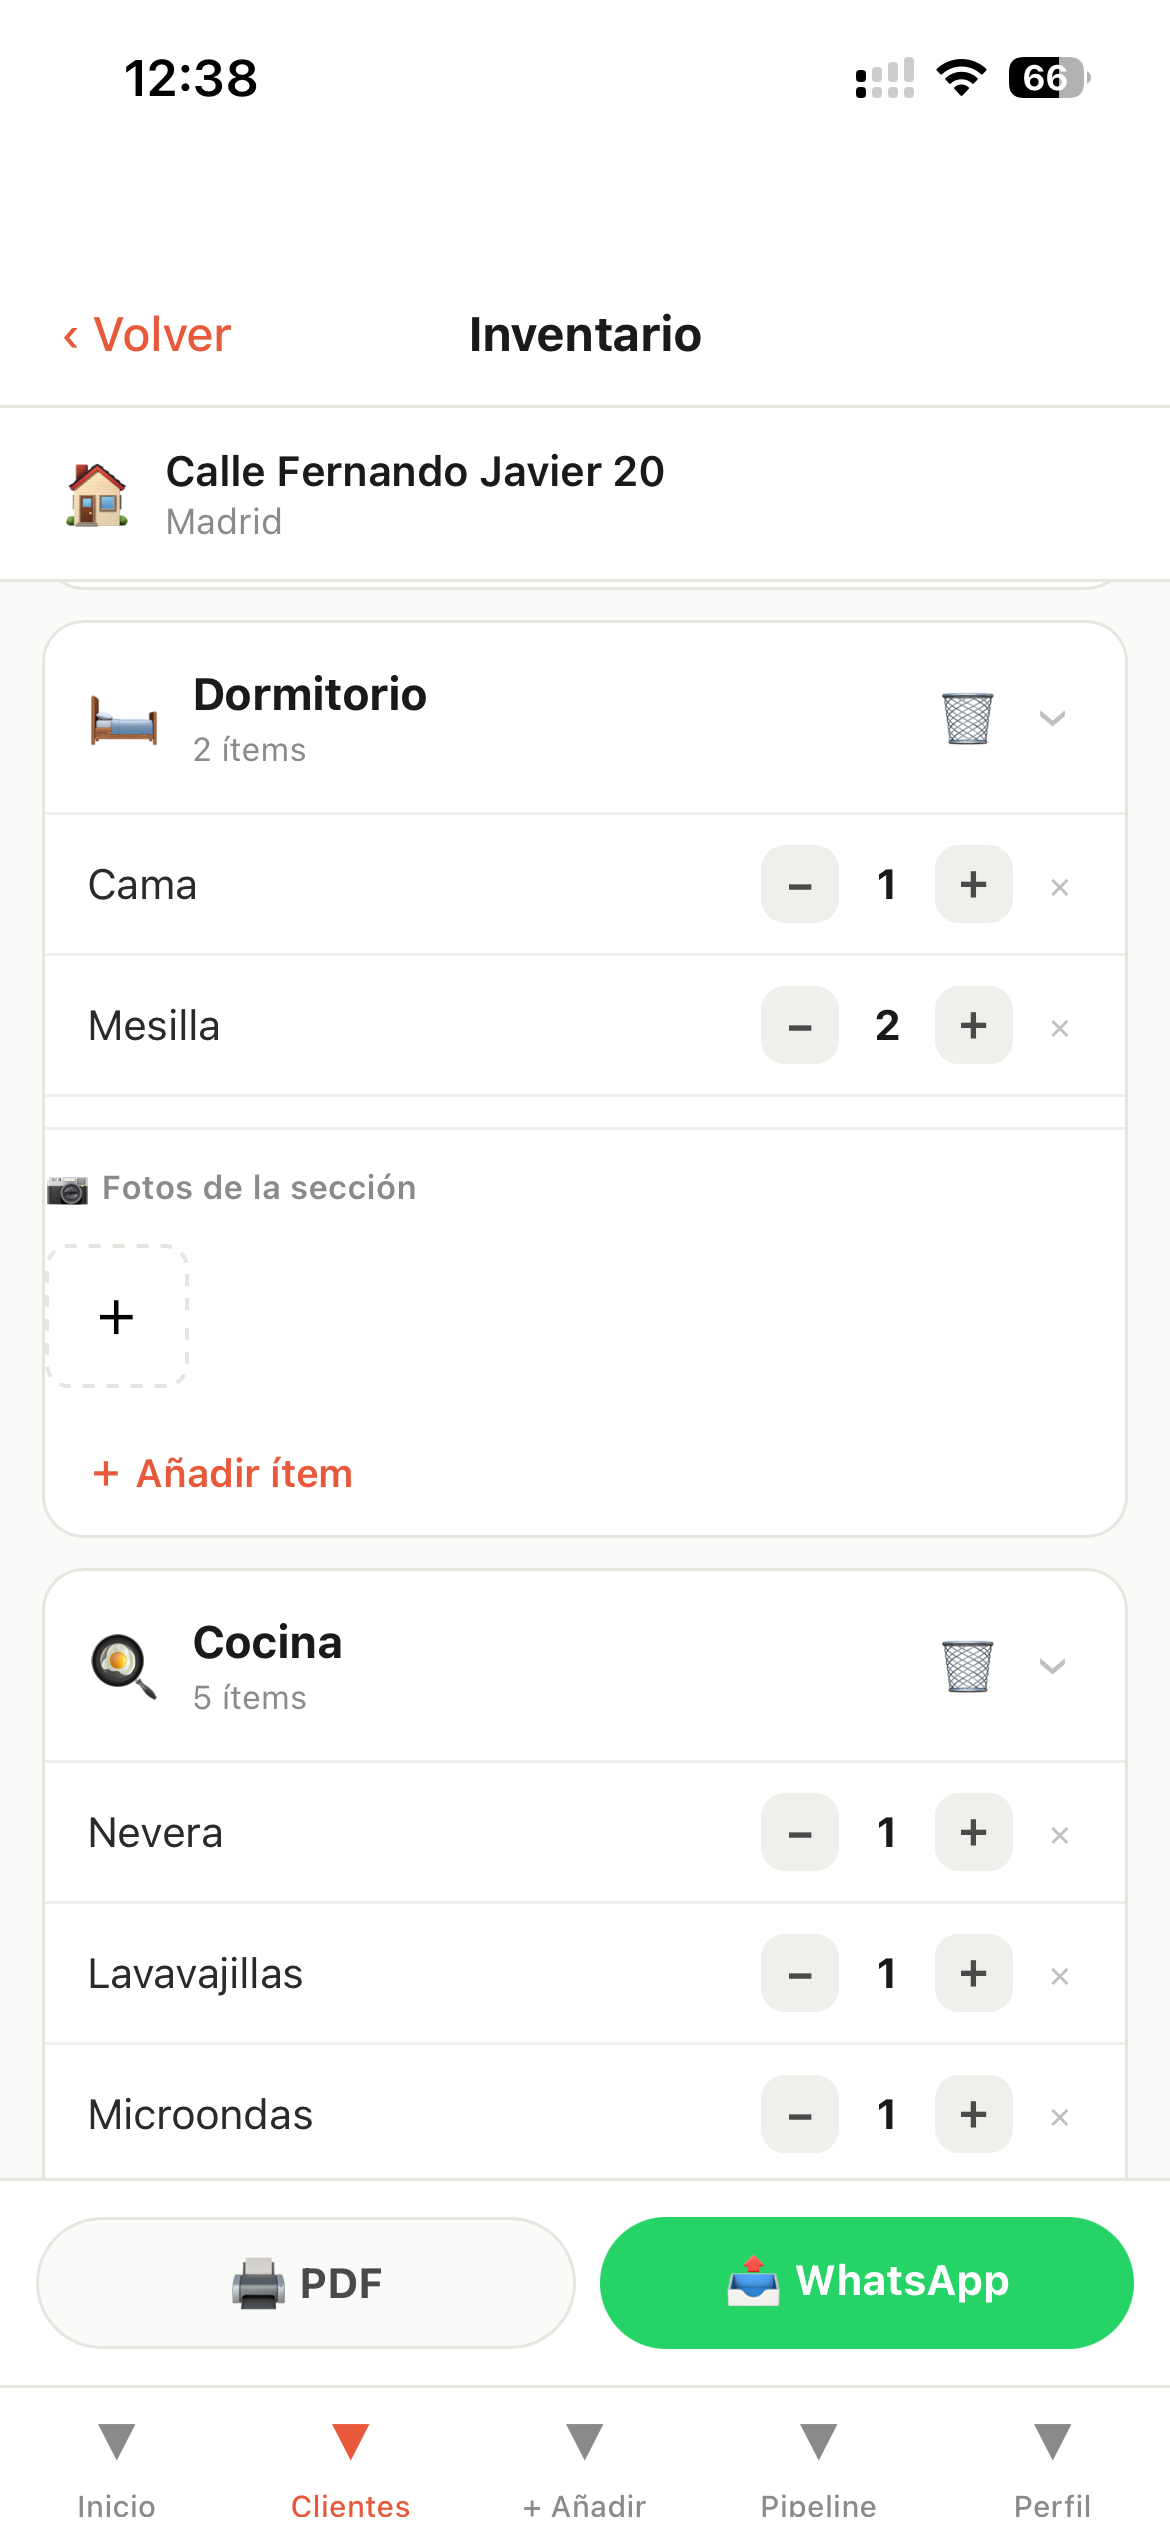
How to generate a free property inventory with Fincta
Fincta is a free CRM for real estate agents that includes a built-in property inventory module. You can create a complete, signed-ready inventory from your phone in about two minutes — no Word templates, no manual PDF formatting, no back-and-forth.
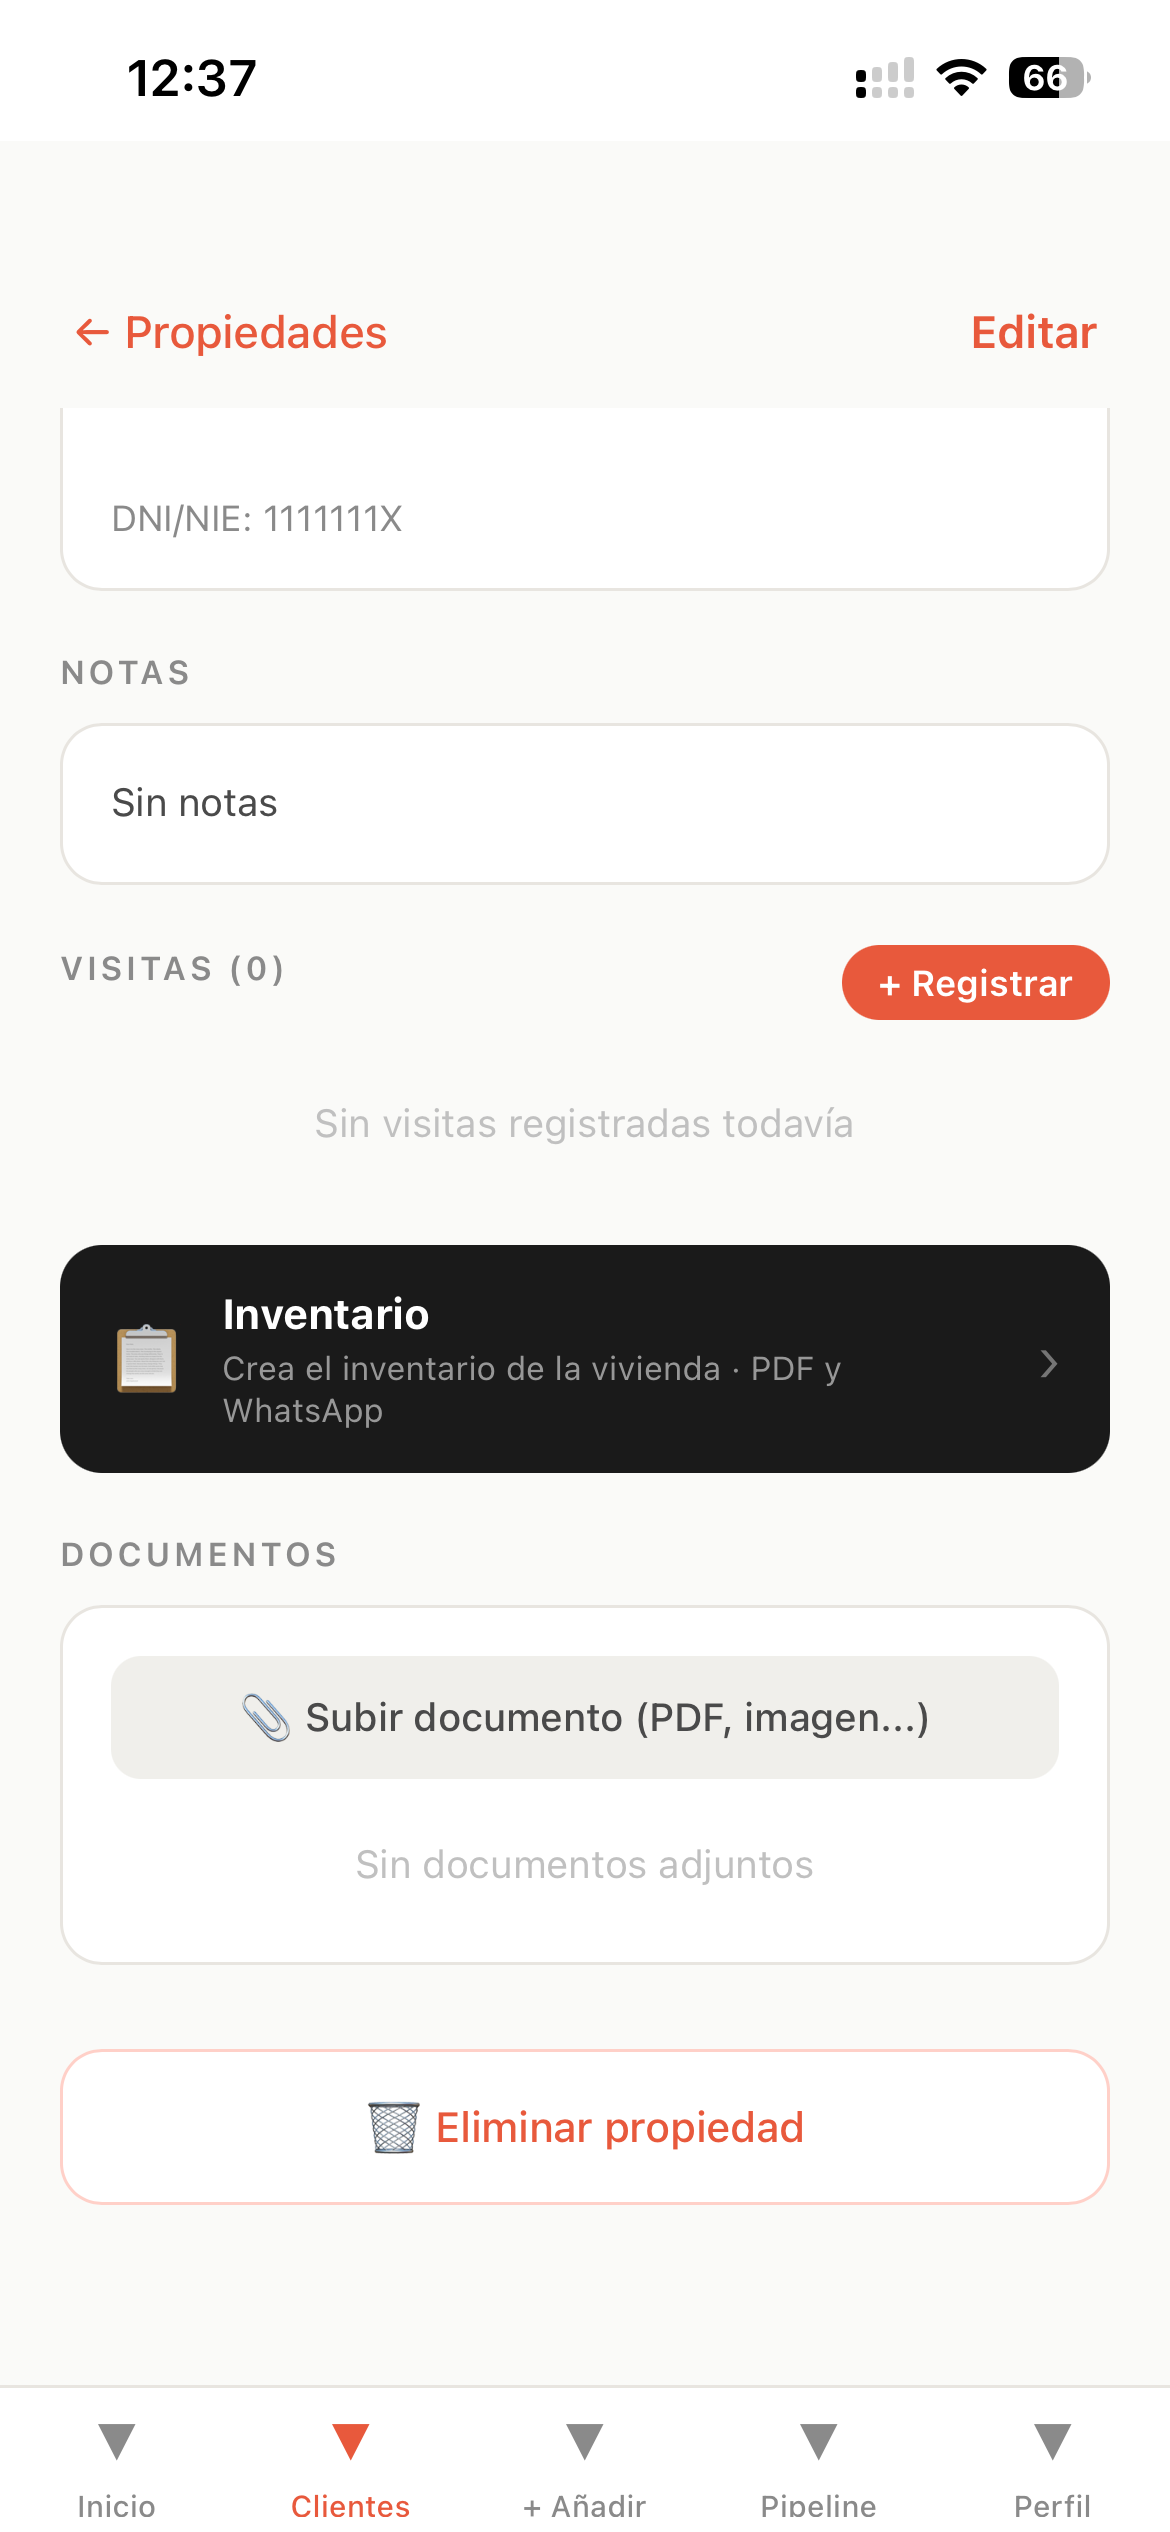
Navigate to the property you want to inventory. You'll see an 📋 Inventario button on the property detail screen. Tap it to open the inventory module.
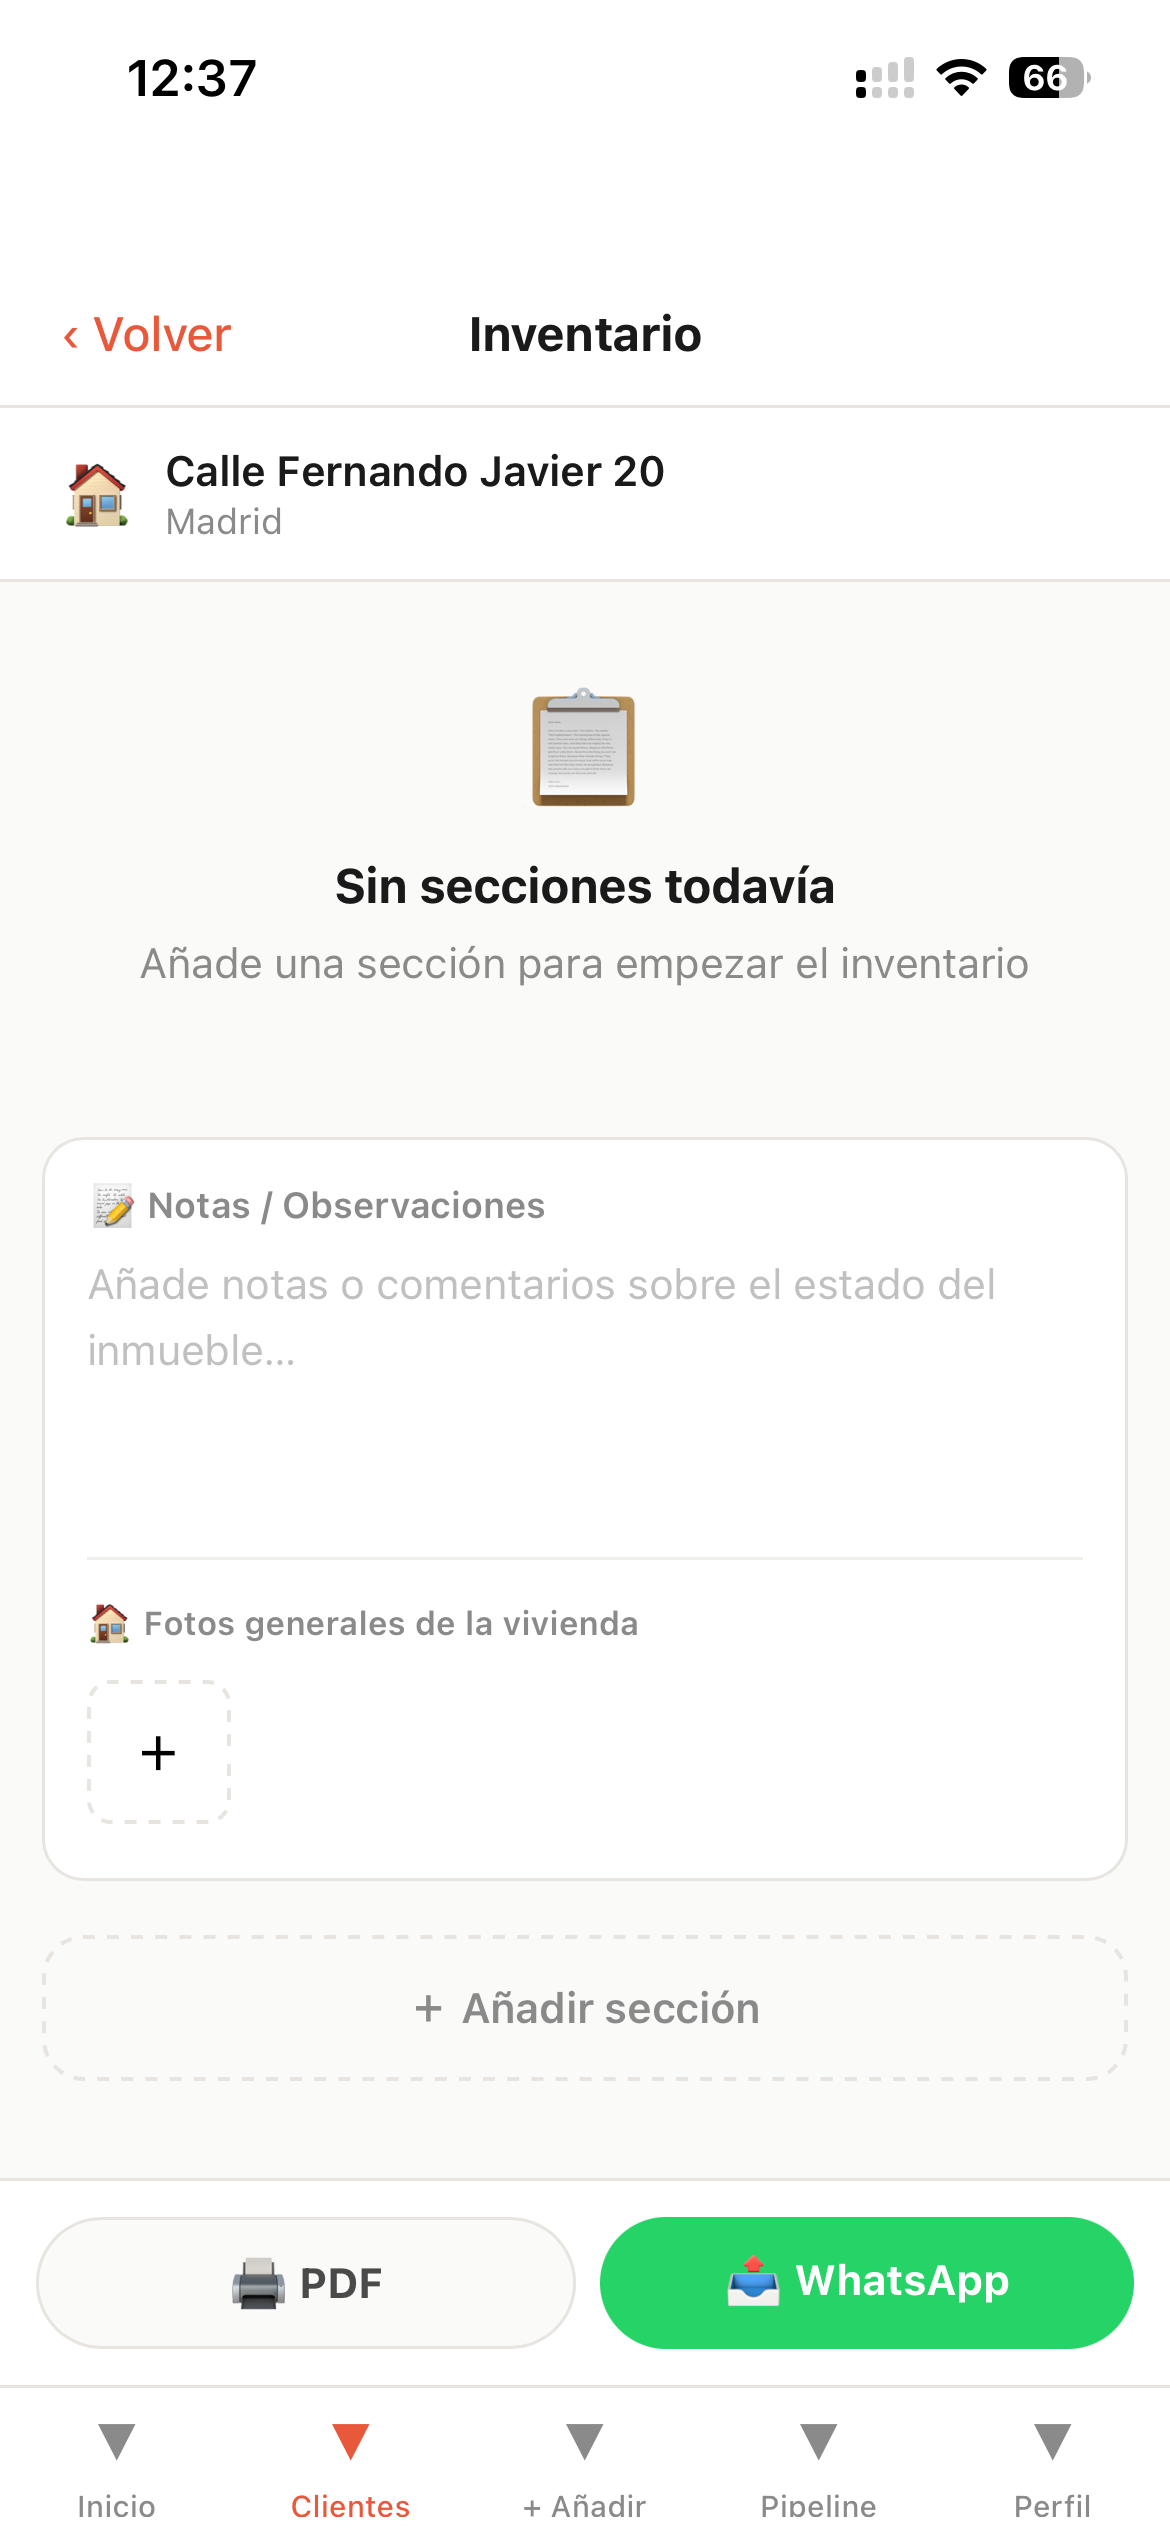
The inventory starts empty. You'll see a Sin secciones todavía screen, which means no sections have been added yet. This is where you'll define the rooms.
Create a section for each room — Bedroom, Kitchen, Living room, Bathroom, and so on. Within each section, add the individual items. You can add as many sections and items as the property requires.
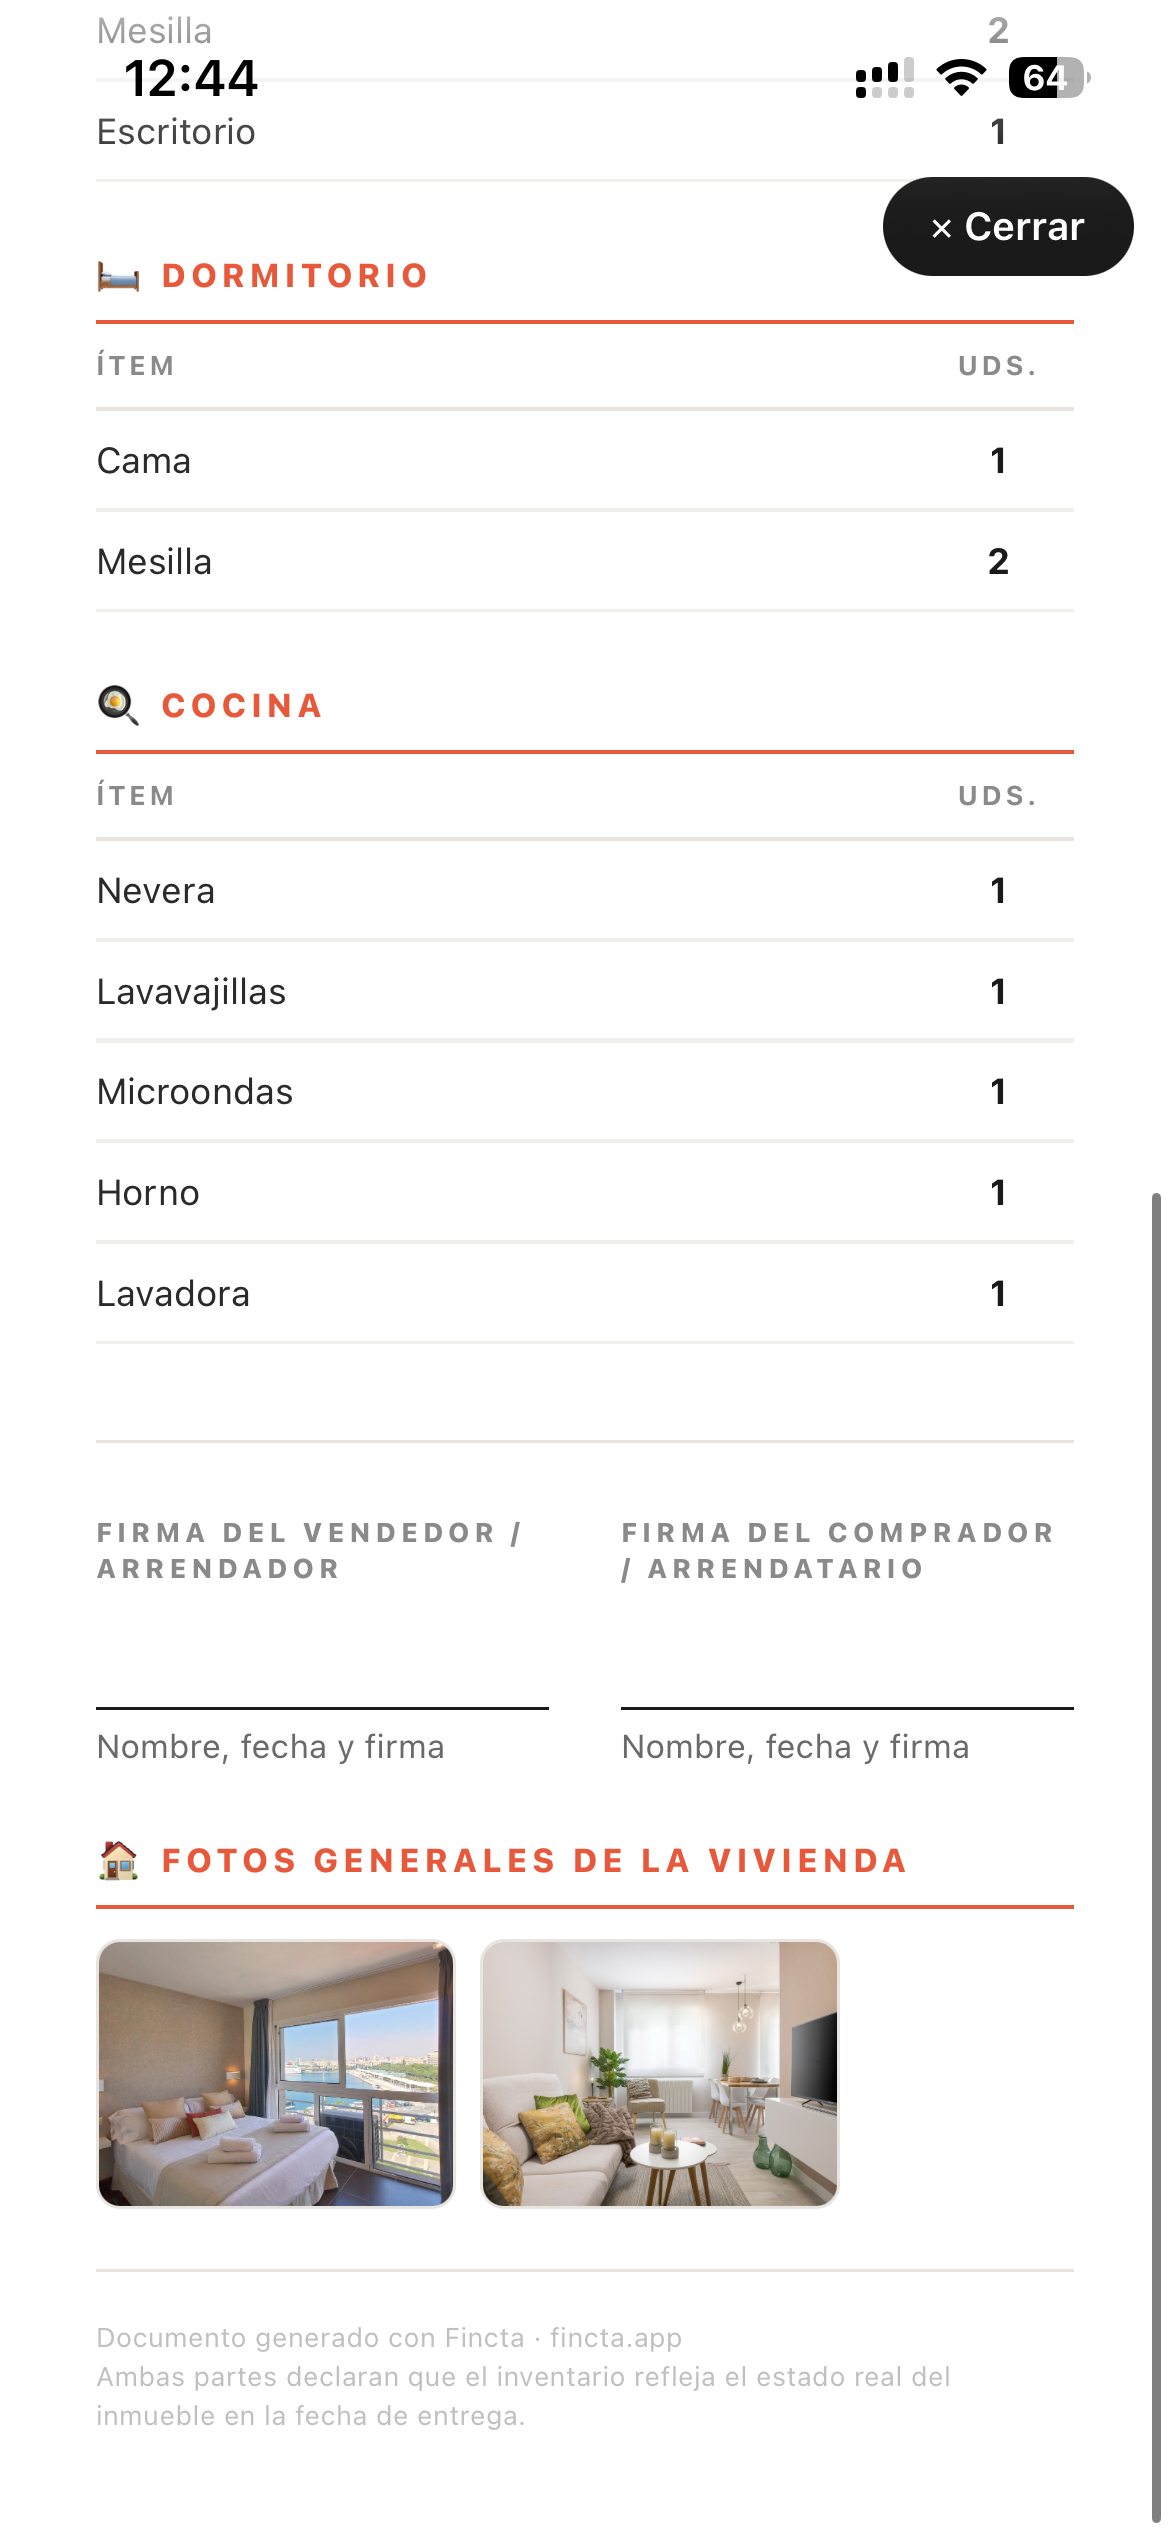
Tap Export to generate the PDF. Fincta produces a clean document with all property details, the room-by-room item list, any attached photos, and signature fields at the bottom. You can share it immediately via WhatsApp or email.
Generate your property inventory now
Free. No apps to download. Works on any phone.
Create your inventory →Why digital is better than a Word template
A Word document inventory has one fundamental problem: the workflow is broken into too many separate steps. You take notes at the property. Then photos on your phone. Then you open the template on your laptop, type everything in, try to insert the photos, resize them, format the document, export it as a PDF, and finally send it. Each step is a friction point where errors happen and time is lost.
A digital inventory tool built into your CRM collapses all those steps into one. Here's what you get that a Word template can't give you:
- Auto-saves in real time — no risk of losing work if your phone dies or the app crashes
- Photos attached per room — taken directly from the inventory screen, organised automatically
- PDF with signature fields built in — no manual formatting, no missing fields
- Share via WhatsApp in one tap — the buyer or tenant gets it instantly, while you're still at the property
- Stored against the property — find it again in seconds, months later, without digging through email attachments
Frequently asked questions
Is a property inventory legally required?
In most jurisdictions, a property inventory is not legally mandated, but it is strongly recommended for any furnished property transfer. Without a signed inventory, disputes over missing or damaged items become very difficult to resolve. For rental agreements in many countries — including the UK, Spain, and France — a signed inventory is standard practice and can be referenced in the event of deposit disputes.
Can I add photos to the inventory?
Yes. Fincta lets you attach photos to each room or section of the inventory directly from your phone's camera. The photos are embedded in the exported PDF, giving you a timestamped visual record of the property's condition at the time of handover — which is the most important evidence in any later dispute.
How do I share the inventory with the buyer or tenant?
Once you export the PDF from Fincta, you can share it directly via WhatsApp, email, or any messaging app — straight from the export screen. The PDF includes a signature field at the bottom so both parties can sign either in person on-screen or print and sign. You can also share it before the handover meeting so both parties can review it in advance.